This blog post builds on the ideas started in three previous blog posts.
I also showed how to deploy the same ML model used in this blog post as a batch job in this blog post, and in a task queue in this blog post.
The code in this blog post can be found in this github repo.
Introduction
In the last few years, a new cloud computing paradigm has emerged: serverless computing. This new paradigm flips the normal way of provisioning resources in a cloud environment on its head. Whereas a normal application is deployed onto pre-provisioned servers that are running before they are needed, a serverless application's codebase is deployed and the servers are assigned to run the application as demand for the application rises.
Although "serverless" can have several different interpretations, the one that is most commonly used by developers is Functions as a Service (FaaS). In this context, a function is a small piece of software that does one thing, and hosting a function as a service means that the cloud provider manages the server on which the function runs and allocates the resources needed to run the function. Another interesting application of the serverless paradigm are databases that are run and managed by cloud providers, some examples of this are AWS Aurora, and Google Cloud Datastore. However, these services don't run code that is provided by the user, so they are not as interesting for deploying an ML model.
Serverless functions provide several benefits over traditionally-deployed software. Serverless functions are inherently elastic since they run only when an event triggers them, this makes them easier to deploy and manage. They are also cheaper to run for the same reason, since charges for execution time of a serverless function only accrue when it is actually running. Lastly, using serverless functions makes software engineers more productive, since a lot of deployment details are abstracted out by the cloud provider, greatly simplifying the deployment process.
Serverless functions have some drawbacks as well. The resources assigned to a function are reclaimed by the cloud provider after a period of inactivity, which means that the next time the function is executed extra latency will be incurred when the resources are reassigned to the function. Cloud providers often have limitations on the resources that a function can take in a given period of time, which means that serverless function might not be a good fit for certain workloads. Lastly, access to the underlying server that is running the function is not available, which limits the ability to control certain aspects of the execution environment.
In this blog post, I will show how to deploy a machine learning model on AWS Lambda, which is the AWS serverless function offering. The code for this blog post can run locally, but to go through all of the scenarios explained it's necessary to get an AWS account. We'll also show how to integrate the lambda with AWS API Gateway, which will make the model hosted by the lambda accessible through a REST API. To interact with the AWS API, the AWS CLI package needs to be installed as well.
Serverless Framework
The serverless framework is a software framework for developing applications that use the serverless FaaS model for deployment. The framework provides a command line interface (CLI) that can operate across different cloud providers and helps software engineers to develop, deploy, test, and monitor serverless functions. We'll be using the serverless framework to work with the AWS Lambda service.
In order to use the serverless framework, we need to first install the node.js runtime. After this, we can install the serverless framework with this command:
npm install -g serverless
After this, we need to get an AWS account and add permissions to allow the framework to create resources, instructions can be found here.
Package Structure
To begin, I set up the project structure for the application package:
- model_lambda ( python package for model lambda app )
    - web_api ( package for handling http requests/responses
        - __init__.py
        - controllers.py
        - schemas.py
    - __init__.py
    - config.py
    - lambda_handler.py ( lambda entry point )
    - model_manager.py
- scripts
    - openapi.py (script for generating an OpenAPI specification)
- tests ( unit tests for the application )
- Makefle
- README.md
- requirements.txt
- serverless.yaml ( configuration for serverless framework )
- setup.py
- test_requirements.txt
This structure can be seen in the github repository.
Lambda Handler
The AWS Lambda service is event-oriented which means that it runs code in responses to events. The entry point for the code is a function called the lambda handler. The lambda handler function is expected to receive two parameters: event and context. The event parameter is usually a dictionary that contains the details of the event that triggered the execution of the lambda. The context parameter is a dictionary that holds information about the function execution and the execution environment.
To begin, we'll add an entry point for the lambda in the lambda_function.py module:
def lambda_handler(event, context):
    """Lambda handler function."""
The code above can be found here.
We'll be adding code to the handler function later.
Model Manager Class
In order to manage a collection MLModel objects in the lambda, we'll reuse a piece of code that we've used before in a previous blog post. In the previous post, I wrote a class called "ModelManager" that is responsible for instantiating MLModel classes from configuration, returning information about the model objects being managed, and return references to the model objects upon request. We can reuse the class in this project since we'll need the same functionality.
The ModelManager class has three methods: get_models() which returns list of models under management, get_model_metadata() which returns metadata about a single model, and get_model() which returns a reference to a model under management. The code for the ModelManager class can be found here. For a full explanation of the code in the class, please read the original blog post.
In order to use the ModelManager class within the model lambda we have to first instantiate it, then call the load_model() method to load MLModels objects we want to host in the lambda. Since the model classes will load their parameters from disk when they are instantiated, it's important that we only do this one time, when the lambda starts up. We can do this by adding this code at the top of the lambda_handler.py module:
# instantiating the model manager class
model_manager = ModelManager()

# loading the MLModel objects from configuration
model_manager.load_models(configuration=Config.models)
The code above can be found here.
By putting this initialization at the top of the lambda function module, we can be sure that the models are initialized one time only. The configuration is loaded from the config.py module found here.
REST Endpoints
An AWS Lambda function is able to handle events from several sources in the AWS ecosystem. In this blog post, we'll build a simple web service that can serve predictions from the models that are hosted by the lambda. To do this, we'll add an API Gateway as an event source to the lambda function later. To be able to handle the HTTP requests sent by the API Gateway, we'll copy the code from a previous blog post used to build a Flask web service. The code that defines the REST endpoints is isolated inside of a subpackage inside of the model_lambda package, since we want to easily adapt the model lambda for other types of integrations.
The data models accepted by the REST endpoints will be the same. We'll use the marshmallow schema package to define the schemas of the objects accepted by and returned from the endpoints. The schemas can be found in this module. Since the API Gateway is handling all of the functionality normally handled by a web application framework, we'll avoid using Flask for building the application. However, we still have to define controller functions that receive requests and return responses to a client. To do this we'll reuse the controllers from the previous blog post and rewrite them a bit to remove the Flask dependency. The new controller functions can be found in this module.
The web_api package within the model_lambda application is built along the same lines as a web application. It is built in this way so that it isolates the functionality to one package within the application. Now that we have the ability to receive HTTP requests and return HTTP responses, we have to integrate it with the AWS Lambda service, we'll do this in the next section.
Handling API Gateway Events
The AWS Lambda service integrates with other systems by using event types. For this blog post, we'll be integrating with an AWS API Gateway, to do this we'll need to handle AWS API Gateway events. The Lambda service sends events to our lambda by encoding all information about an HTTP request into a dictionary data structure and calling the lambda handler function with the dictionary as the "event" parameter. In order to integrate our REST endpoint code with the API Gateway, we'll need to recognize the event type, route the request to the right REST endpoint, encode the HTTP response into a dictionary, and return it to the Lambda service. The Lambda service will then return the response to the API Gateway which will create the actual HTTP response that will go back to the client.
To recognize the API Gateway event type, we'll check for a few fields in the event dictionary:
if event.get("resource") is not None \
    and event.get("path") is not None \
    and event.get("httpMethod") is not None:
The code above can be found here.
Once we're sure that we have an API Gateway event, we can choose which REST endpoint to route the request to:
if event["resource"] == "/api/models" and event["httpMethod"]c== "GET":
    response = get_models()
The code above can be found here.
If the API Gateway event is a request for the "models" endpoint with the GET verb, we'll route it to the get_models() controller function. This will return a list of the model available for prediction to the API Gateway, which will then return it as an HTTP response to the client system.
Next, we'll route to the metadata endpoint:
elif event["resource"] == "/api/models/{qualified_name}/metadata" \
        and event["httpMethod"] == "GET":
    response = get_metadata(qualified_name=event["pathParameters"]["qualified_name"])
The code above can be found here.
The get_metadata() function requires a parameter called "qualified_name" which is the unique name of the model that the client wants the metadata for. This parameter is parsed for us from the path of the request by the API Gateway, and is sent in the "pathParameters" field in the event dictionary.
Next, we'll route to the "predict" endpoint:
elif event["resource"] == "/api/models/{qualified_name}/predict" \
        and event["httpMethod"] == "POST" \
        and event.get("pathParameters") is not None \
        and event["pathParameters"].get("qualified_name") is not None:
    response = predict(qualified_name=event["pathParameters"]["qualified_name"], request_body=event["body"])
The code above can be found here.
This endpoint takes a little more effort since it also requires that the body of the request be sent to the predict() function.
Lastly, we'll raise an error for any resources in the API Gateway that we can't handle:
else:
    raise ValueError("This lambda cannot handle this resource.")
The code above can be found here.
This last statement raises an exception if the lambda can't handle the resource that the API Gateway is requesting. This should never happen if the API Gateway is created correctly, since only the three resources listed above will be added to the API Gateway when we create it.
Now that the REST endpoint code has handled the request and created a response, we have to encode it into a dictionary that the Lambda service will send back to the API Gateway:
return {
    "isBase64Encoded": False,
    "statusCode": response.status,
    "headers": {"Content-Type": response.mimetype},
    "body": response.data
}
The code above can be found here.
Lastly, we close the lambda handler by throwing an exception if we can't identify the event type:
else:
    raise ValueError("This lambda cannot handle this event type.")
The code above can be found here.
The code in this section forms an adapter layer between the Lambda service and the web application that we want to build. For the sake of good engineering practices, we isolate the code that deals with interfacing with the AWS Lambda service and the code that handles the HTTP requests and responses. By building the code this way, we have a much easier time writing unit tests for the code.
Adding Serverless Configuration
The serverless framework provides a command for starting a python lambda project, we'll skip using this command since we already created the lambda handler code inside of the model_lambda packages. We'll create the settings file that the serverless framework works with by hand. The file name is serverless.yml and it should be in the root of the project.
To begin we'll add a few basic things to the file:
service: model-service

provider:
  name: aws
  runtime: python3.7

stage: dev
region: us-east-2
The code above can be found here.
These values will be used by the serverless framework to create a service. A service can contain one or more functions plus any other resources needed to support them. The name of the service is "model-service", the provider will be AWS and the function runtime will be python 3.7. The default stage will be "dev" and the default region will be us-east-2. The values can be changed at deployment time.
Now we can add a function to the service:
functions:
  model-lambda:
    handler: model_lambda.lambda_function.lambda_handler
The code above can be found here.
The function will be named "model-lambda", and the handler points at the location of the lambda_handler function that we put into the lambda_function module. The lambda_handler function is located within the lambda_function module, which is located in the model_lambda package.
These lines are the only ones needed to get the basic settings in place for the lambda. In the next sections we'll add more lines to the serverless.yml file to handle other things.
Building a Deployment Package
The serverless framework can help us to build a deployment package for the model-lambda, but to do this we need to add an extension called "serverless-python-requirements". This extension allows the serverless framework to create deployment packages that include all of the python dependencies for the model-lambda code. The extension uses the requirements.txt file in the root of the project. To install the extension, use this command:
sls plugin install -n serverless-python-requirements
This command will add a node_modules folder to the project folder, and some other files to keep track of the node.js dependencies of the extension.
In order for the serverless framework to make use of the extension for this project, we have to add this line to the serverless.yml file:
plugins:
  - serverless-python-requirements
This code can be found here.
Once serverless can find the extension, we can modify the way that the extension will create the deployment package by adding these lines to the serverless.yml file:
custom:
  pythonRequirements:
    dockerizePip: true
    slim: true
    noDeploy:
      - apispec
      - PyYAML
The code above can be found here.
The dockerizePip options makes the serverless-python-requirements extension do the installation of the packages within the docker-lambda image which will guarantee that the deployment package will work in the lambda service. The slim options causes the extension to not put several unneeded file types in the deployment package, such as "*.__pycache__" files.
The noDeploy list of packages will cause the build process to ignore those packages, in this case we don't need the apispec and PyYAML packages in the lambda.
Once we have all of this set up, we can test the creation of the deployment package by using this command:
sls package
After executing this command, the serverless framework will create a new folder called ".serverless" inside of the project root. This folder contains several different files that will be used when deploying the service to AWS. The file we are interested in is called "model-service.zip", this file is the deployment package which will be used to create the lambda. When we open this file we'll see that the serverless framework actually packaged almost all of the files in the project folder into the deployment package, most of which are not needed. To prevent this we'll add these lines to the serverless.yml file:
package:
  exclude:
    - "**/**"
  include:
    - "model_lambda/**"
The code above can be found here.
These lines tell the serverless framework to only add the code in the model_lambda python package to the lambda deployment package. This step is important because the AWS Lambda service has a limit on the size of deployment packages.
Having written scripts that build lambda deployment packages for lambdas that have scikit-learn and numpy before, I can say that the serverless-python-requirements extension makes everything much simpler. The addition of the docker image for compiling source Python packages makes everything even better since it guarantees that the deployment package will work correctly in the AWS Lambda python environment. By leveraging on the serverless framework and the serverless-python-requirements extension to do this for us, we've avoided writing a lot of code for deploying the lambda.
Deploying the Model Lambda
Now that we have the deployment package in hand, we can try to create the lambda in AWS. To do this, we execute this command:
sls deploy
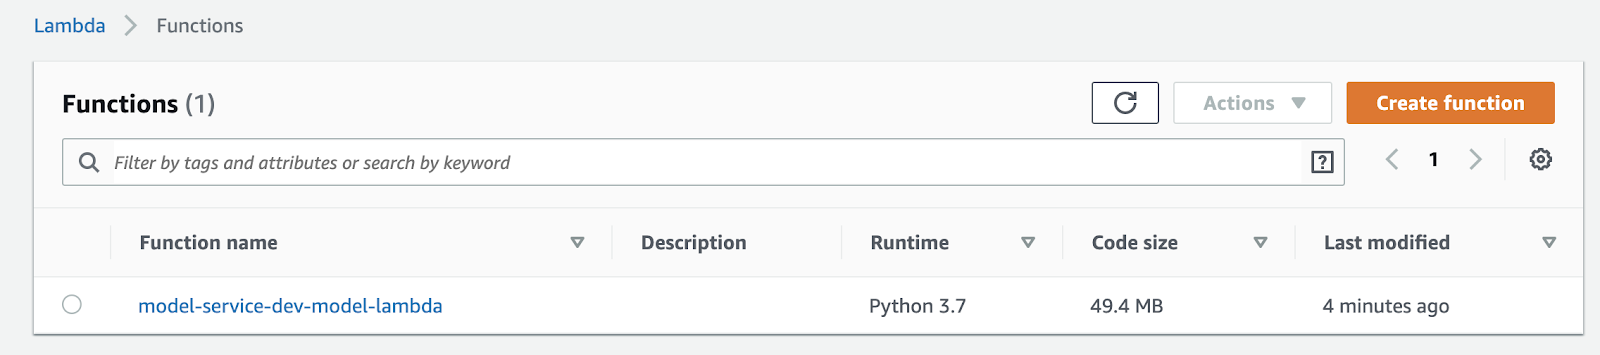
This command will interact with the AWS API to create the lambda, using a CloudFormation template. If we log in to the AWS console, we can see the lambda listed in the user interface of the AWS Lambda service:
We can execute the lambda in the cloud with this command:
serverless invoke -f model-lambda -s dev -r us-east-1 -p tests/data/api_gateway_list_models_event.json
The command executes the lambda through the AWS API using a test event from the unit tests folder.
Adding a RESTful Interface
Now that we have a lambda working inside of the AWS Lambda service, we need to connect it to an event source. The serverless framework supports this by adding an "events" array to the lambda function in serverless.yml file:
events:
  - http:
      path: api/models
      method: get
  - http:
      path: api/models/{qualified_name}/metadata
      method: get
      request:
        parameters:
          paths:
            qualified_name: true
  - http:
      path: api/models/{qualified_name}/predict
      method: post
      request:
        parameters:
          paths:
            qualified_name: true
The code above can be found here.
The three events above correspond to three AWS API Gateway resources that will trigger a lambda execution when they receive requests. After adding these events, we can execute the deploy command again to create the API Gateway:
sls deploy
The API Gateway and it's resources are added to the CloudFormation template that serverless manages for the service, and serverless uses the AWS API to create the API Gateway and route the events to the lambda.
The deploy command returned the URL of the new API Gateway endpoints, so to test out the new API Gateway I simply executed this command:
curl https://ra2nrqnhrj.execute-api.us-east-1.amazonaws.com/dev/api/models
As expected, the endpoint returned information about the iris_model MLModel that is configured. Note that the endpoint is not secured, so it's not a good idea to keep the API Gateway running for a long time. To delete the AWS resources we've been working with, execute this command:
sls remove
Even though we can create an API Gateway by using the serverless framework, the serverless.yml file is missing a lot of information that is provided by an OpenAPI specification. In order to properly document the API, I created an OpenAPI specification for the API we created, it can be found here.
Closing
A benefit of deploying an ML model on an AWS Lambda is the simplicity of the deployment. By removing the need to manage servers, the path to deploying an ML model is much faster and simpler. Another benefit is the number of integrations that AWS provides for the Lambda service. In this blog post, we showed how to integrate the lambda with an API Gateway to create a RESTful service, but there are many other options available.
A drawback of the lambda service is that is suffers from cold start latency. A coldstart happens when a lambda is executed in response to an event after not being used for 15 minutes, when this happens, the lambda takes extra time to respond to the request. This blog post goes into the details of this problem. The cold start problem becomes even more pronounced with a lambda that is hosting an ML model because the model parameters need to be deserialized when the lambda first starts up, which adds to the cold start time.
Another problem that we might face when deploying an ML model inside a lambda is the limits on the deployment package size. The AWS Lambda service limit for the deployment package size is 50 MB. When packaging model files along with the deployment package we might go beyond that limit very easily. This can be fixed by having the lambda pick up the model files from an S3 bucket. I will show details for a simple and general way to do this in a later blog post.
An interesting way to improve the code is to make it possible to integrate other data sources in AWS with the model lambda. For example, we can have the Lambda listen for events coming from a Simple Queueing Service queue, make a prediction and put the prediction result in another SQS queue. Another option is to do a similar integration with the AWS Kinesis service for doing streaming analytics. Both of these services can be integrated with AWS Lambda easily.