Decorator Pattern for ML Models
Introduction
The decorator pattern is a software engineering pattern that allows software to be more flexible, more reusable, and more cohesive. In this blog post, we’ll explore how decorators work, how to implement them, how to apply them to the MLModel base class, and how to deploy them in a REST service.
We’ll be building on top of the MLModel base class that we’ve built in a previous blog post. The MLModel base class is designed to be wrapped around the prediction functionality of a machine learning model. It has several properties that allow a model object to describe itself to the outside world, including its name, version, and input and output schemas. The MLModel base class also requires that any class that inherits from it to implement the __init__() method, and the predict() method. These two methods form the most simple functionality of a machine learning model, the __init__() method is where model parameters are loaded, and the predict() method is where predictions are made.
The Decorator Pattern
The decorator pattern is an object-oriented design pattern that is useful when behavior needs to be added to an object without changing the object’s class or subclassing the object’s class. A decorator is an object that “decorates” the API of the object that it is decorating while not modifying the API of the object. The decorator executes its own behavior before and after the behavior of the decorated object, in this way, the decorator instance acts as a “gateway” to the decorated object.
How to Build a Decorator
A decorator is a class that has the same API as the class that we want to decorate. In order to build a decorator, we’ll first create a Decorator base class by following these steps:
- Subclass the class we want to decorate, creating a Decorator class with the same API.
- In the Decorator class, add an instance attribute that can point to an instance of the class that we want to decorate.
- When instantiating the Decorator class, receive an instance of the class we want to decorate and save it to the instance attribute.
- In the Decorator class, implement the methods of the API of the class we want to decorate, calling the methods of the instance attribute and returning the results to the caller.
If we instantiate the Decorator base class, the decorator instance will just forward all method calls to the decorated object, which is not very useful. To actually build a Decorator, we’ll need to create a subclass of it like this:
- Create a subclass of Decorator that overrides the methods that you want to modify, adding your own behavior.
- Make sure that you call the corresponding methods in the instance attribute from the Decorator’s methods in order to allow the decorated object to still execute its own behavior.
Notice that a decorator instance can actually decorate another decorator instance, which allows us to “stack” decorators together to do more complex things.
Benefits of the Decorator Pattern
One of the great benefits of decorators is the flexibility that they bring to software development. Without the use of decorators, an object’s class must be modified or subclassed in order to modify its behavior. By using decorators, we can modify the behavior just by attaching the decorator to the object. The “decoration” of an object can be done at runtime and can be configuration-driven, which means that we can change a program’s behavior quickly and easily by modifying its configuration instead of its source code.
Another benefit of decorators in that the API of the object that is decorated does not change at all. Any other object that depends on the API of the decorated object can use it without modification and without being aware that it is decorated. The only problems that arise when applying decorators is if an object depends on another object’s specific behavior instead of its API, however this is an antipattern and should be avoided.
Yet another benefit of decorators is the ability to reuse them across different parts of an application. If we need to add the same behavior to many different objects which share the same API, we can create a decorator class that implements the behavior and attach it to the specific objects that we need to modify. If we had modified the behavior of the objects by changing their class, we would force all instances of the class to have the new behavior that we needed. If we subclassed the original class to add behavior, we would be adding another level of abstraction to the design which makes everything more complicated. By using decorator instances and only attaching them only to the objects that we actually need to modify, we simplify the application’s codebase.
By adding the decorator pattern to a codebase, we are able to make the whole codebase more cohesive. This is because we’re making individual classes that do one thing only. If we need to add some extra behavior to the class, we can attach a decorator that adds only that behavior instead of adding the behavior to the original class. The single responsibility principle tells us that a class should have only one reason to change, by using decorators we can make following this principle in our code a lot easier.
Decorators also encourage us to use a compositional approach to software development, which means that we create the desired behavior of the program by “composing” it from various smaller pieces of code. This is different from a hierarchical approach in which we define new behaviors by inheriting from and extending the behavior of base classes. Building software through composition is simpler in the long run because it incentivizes us to use simpler inheritance hierarchies that are easier to work with.
Decorators in the Python Language
The Python programming language already has a feature called decorators, which is syntactic sugar that allows a programmer to extend the functionality of a function or class. A decorator of this type is a function that takes a function or a class as a parameter and extends it with new behavior. Functions that are “decorated” have the name of the decorator function prepended with a “@” symbol:
@my_decorator
def my_function():
    ...
In this case the decorated function is called my_function and the decorator function is called my_decorator. It’s important to understand that in this blog post, we are not talking about this kind of decorator, although it is a similar concept. A great place to learn about Python decorators is here.
The decorator that is supported by the Python language allows you to decorate code, but does not allow for dynamic runtime behavior. That is to say, we can modify a function right after it is loaded, but not before it is executed. The type of decoration we will be building in this blog post will allow us to decorate MLModel objects at runtime, regardless of the actual code. This means that we’ll be able to add decorators are runtime from configuration, adding some flexibility to our software.
Base Class for Decorators
The decorator pattern requires that we define a base class for the decorators that we want to actually build.
First, we'll install the ml_base package
from IPython.display import clear_output

!pip install ml_base>=0.2.0

clear_output()
The MLModelDecorator base class looks like this:
from typing import Optional
from ml_base.ml_model import MLModel


class MLModelDecorator(MLModel):

    def __init__(self, model: Optional[MLModel] = None, **kwargs) -> None:
        if model is not None and not isinstance(model, MLModel):
            raise ValueError("Only objects of type MLModel can be wrapped with MLModelDecorator instances.")

        self.__dict__["_model"] = model
        self.__dict__["_configuration"] = kwargs


    @property
    def display_name(self) -> str:
        return self.__dict__["_model"].display_name

    @property
    def qualified_name(self) -> str:
        return self.__dict__["_model"].qualified_name

    @property
    def description(self) -> str:
        return self.__dict__["_model"].description

    @property
    def version(self) -> str:
        return self.__dict__["_model"].version

    @property
    def input_schema(self):
        return self.__dict__["_model"].input_schema

    @property
    def output_schema(self):
        return self.__dict__["_model"].output_schema

    def predict(self, data):
        return self.__dict__["_model"].predict(data=data)


clear_output()
The MLModelDecorator base class is actually defined in the ml_base package in version 0.2.0 and above. We can also import the class from the ml_base package like this:
from ml_base.decorator import MLModelDecorator
The base class for ML Model decorators is designed to hold a reference to an MLModel instance and add no behavior to it. Every method in the decorator just calls the corresponding method on the MLModel instance. This is done on purpose so that we can easily build simple decorators that only work on a single method while leaving all of the other methods and properties alone.
Installing a Model
To make this blog post a little shorter we won't build a new model to work with. Instead we'll install a model that we've built in the past.
To install the model, we can use the pip command and point it at the github repo of the model:
!pip install -e git+https://github.com/schmidtbri/regression-model#egg=insurance_charges_model

clear_output()
The model is used to estimate insurance charges and we built it in a previous blog post. The code for the model is in this github repository.
To make a prediction with the model, we'll import the model's class:
from insurance_charges_model.prediction.model import InsuranceChargesModel
Now we can instantiate the model:
model = InsuranceChargesModel()
To make a prediction, we'll need to use the model's input schema class.
from insurance_charges_model.prediction.schemas import InsuranceChargesModelInput, \
    SexEnum, RegionEnum

model_input = InsuranceChargesModelInput(age=21,
                                         sex=SexEnum.male,
                                         bmi=20.0,
                                         children=0,
                                         smoker=False,
                                         region=RegionEnum.southwest)
Now we can make a prediction with the model by calling predict() with the input.
prediction = model.predict(model_input)

prediction
InsuranceChargesModelOutput(charges=2231.7)
The model predicts that the charges will be $2231.70.
Decorating the Model
To show how the simplest possible decorator works, we'll instantiate the MLModel class and the MLModelDecorator class:
from ml_base import MLModelDecorator

decorator = MLModelDecorator(model)

decorator
MLModelDecorator(InsuranceChargesModel)
The decorator instance is wrapping the model. When we print the decorator object it shows us that it is wrapping the IrisModelMock instance.
All of the properties of the IrisModelMock instance can still be accessed:
print(decorator.display_name)
print(decorator.qualified_name)
print(decorator.description)
print(decorator.version)
print(decorator.input_schema)
print(decorator.output_schema)
Insurance Charges Model
insurance_charges_model
Model to predict the insurance charges of a customer.
0.1.0
<class 'insurance_charges_model.prediction.schemas.InsuranceChargesModelInput'>
<class 'insurance_charges_model.prediction.schemas.InsuranceChargesModelOutput'>
The MLModelDecorator base class actually makes no modifications to the results that it "passes through" from the model instance.
We can also make predictions with the predict() method:
prediction = decorator.predict(model_input)

prediction
InsuranceChargesModelOutput(charges=2231.7)
The MLModel decorator base class is not very useful by itself, we need to subclass it to add custom behaviors.
Creating a Simple Decorator
We'll override the default implementation of the MLModelDecorator base class in order to add some behavior.
This decorator executes around the predict() method:
class SimplePredictDecorator(MLModelDecorator):

    def predict(self, data):
        print("Executing before prediction.")
        prediction = self._model.predict(data=data)
        print("Executing after prediction.")
        return prediction
The decorator wraps around the predict() method and does nothing except print a message before and after executing the predict method of the model.
We can try it out by wrapping the model instance again:
decorator = SimplePredictDecorator(model)
Now, we'll call the predict method:
prediction = decorator.predict(model_input)

prediction
Executing before prediction.
Executing after prediction.


InsuranceChargesModelOutput(charges=2231.7)
The decorator instance executed before and after the model's predict() method and printed some messages.
Adding UUIDs to Predictions
Now we’ll build a decorator class that adds the ability to generate UUIDs for each prediction that a model makes. A UUID is a universally unique 128-bit identifier that can be generated for anything that we want to identify uniquely. In this case, we’d like to identify an individual prediction that an ML model makes.
To do this, we’ll have to do four things:
- Modify the description of the model to add info about the prediction id.
- Modify the input schema of the model add an optional field that accepts UUIDs.
- Modify the output schema of the model to add a field for the UUID.
- Modify the predict() method to generate a UUID and return it alongside the prediction.
Here is the code for the decorator:
from typing import Optional
from pydantic import create_model
from uuid import uuid4


class PredictionIDDecorator(MLModelDecorator):

    @property
    def description(self) -> str:
        decorator_description = " This model also has an optional input called 'prediction_id' that accepts an UUID string to uniquely identify the prediction returned. If the prediction id is not provided, a UUID is generated and returned in a field called 'prediction_id' in the model output."
        return self._model.description + decorator_description

    @property
    def input_schema(self):
        input_schema = self._model.input_schema
        new_input_schema = create_model(
            input_schema.__name__,
            prediction_id=(Optional[str], None),
            __base__=input_schema,
        )
        return new_input_schema

    @property
    def output_schema(self):
        output_schema = self._model.output_schema
        new_output_schema = create_model(
            output_schema.__name__,
            prediction_id=(str, ...),
            __base__=output_schema,
        )
        return new_output_schema

    def predict(self, data):
        if hasattr(data, "prediction_id") and data.prediction_id is not None:
            prediction_id = data.prediction_id
        else:
            prediction_id = str(uuid4())

        prediction = self._model.predict(data=data)
        wrapped_prediction = self.output_schema(prediction_id=prediction_id, **prediction.dict())
        return wrapped_prediction
We’ll try it out but instantiating the decorator with the IrisModel model instance:
uuid_decorated_model = PredictionIDDecorator(model)

uuid_decorated_model
PredictionIDDecorator(InsuranceChargesModel)
The description should be different:
uuid_decorated_model.description
"Model to predict the insurance charges of a customer. This model also has an optional input called 'prediction_id' that accepts an UUID string to uniquely identify the prediction returned. If the prediction id is not provided, a UUID is generated and returned in a field called 'prediction_id' in the model output."
Next, we’ll take a look at the output schema:
uuid_decorated_model.input_schema.schema()
{'title': 'InsuranceChargesModelInput',
 'description': "Schema for input of the model's predict method.",
 'type': 'object',
 'properties': {'age': {'title': 'Age',
   'description': 'Age of primary beneficiary in years.',
   'minimum': 18,
   'maximum': 65,
   'type': 'integer'},
  'sex': {'title': 'Sex',
   'description': 'Gender of beneficiary.',
   'allOf': [{'$ref': '#/definitions/SexEnum'}]},
  'bmi': {'title': 'Body Mass Index',
   'description': 'Body mass index of beneficiary.',
   'minimum': 15.0,
   'maximum': 50.0,
   'type': 'number'},
  'children': {'title': 'Children',
   'description': 'Number of children covered by health insurance.',
   'minimum': 0,
   'maximum': 5,
   'type': 'integer'},
  'smoker': {'title': 'Smoker',
   'description': 'Whether beneficiary is a smoker.',
   'type': 'boolean'},
  'region': {'title': 'Region',
   'description': 'Region where beneficiary lives.',
   'allOf': [{'$ref': '#/definitions/RegionEnum'}]},
  'prediction_id': {'title': 'Prediction Id', 'type': 'string'}},
 'definitions': {'SexEnum': {'title': 'SexEnum',
   'description': "Enumeration for the value of the 'sex' input of the model.",
   'enum': ['male', 'female'],
   'type': 'string'},
  'RegionEnum': {'title': 'RegionEnum',
   'description': "Enumeration for the value of the 'region' input of the model.",
   'enum': ['southwest', 'southeast', 'northwest', 'northeast'],
   'type': 'string'}}}
Even though the IrisModelMock didn't have a "prediction_id" in its input schema, the decorated model instance now has the field as an optional string field. This new field was added by the decorator instance.
We can see the prediction_id field schema by selecting it from the properties:
uuid_decorated_model.input_schema.schema()["properties"]["prediction_id"]
{'title': 'Prediction Id', 'type': 'string'}
The output schema of the model was also modified.
uuid_decorated_model.output_schema.schema()
{'title': 'InsuranceChargesModelOutput',
 'description': "Schema for output of the model's predict method.",
 'type': 'object',
 'properties': {'charges': {'title': 'Charges',
   'description': 'Individual medical costs billed by health insurance to customer in US dollars.',
   'type': 'number'},
  'prediction_id': {'title': 'Prediction Id', 'type': 'string'}},
 'required': ['prediction_id']}
In the output the "prediction_id" is a a required field, we did this because we want to always have a prediction_id associated with a prediction. To see how the decorator uses these new field, we'll make a prediction:
prediction = uuid_decorated_model.predict(
    uuid_decorated_model.input_schema(age=21,
                                      sex=SexEnum.male,
                                      bmi=20.0,
                                      children=0,
                                      smoker=False,
                                      region=RegionEnum.southwest))

prediction
InsuranceChargesModelOutput(charges=2231.7, prediction_id='e84ab429-acec-4630-83d2-12809f222ae2')
The prediction now has a randomly generated UUID attached to it by the decorator in the "prediction_id" field.
We had to use the input schema returned by the decorator because the original InsuranceChargesModelInput schema class is no longer the model's input schema. The decorator creates a new class that becomes the model's new input schema.
If we want to provide a prediction_id with the model's input, the decorator will not generate a new prediction_id, instead it will return the prediction_id that was provided in the input.
prediction = uuid_decorated_model.predict(
    uuid_decorated_model.input_schema(age=21,
                                      sex=SexEnum.male,
                                      bmi=20.0,
                                      children=0,
                                      smoker=False,
                                      region=RegionEnum.southwest,
                                      prediction_id="asdf-1234-asdf-1234"))

prediction
InsuranceChargesModelOutput(charges=2231.7, prediction_id='asdf-1234-asdf-1234')
The prediction_id returned by the model now has the same prediction_id that we provided to the model's input, the prediction_id was not generated.
This decorator will work with any model that works with the MLModel base class, as long as the UUID field can be attached to the root of the input and output schemas.
Adding Decorators to a Deployed Model
In order to deploy a model with a decorator we'll need to create a service that can add decorators to the model instance right after it is intantiated. This is supported by the rest_model_service package in version 0.2.0 and above. We built the rest_model service package in a previous blog post to easily deploy MLModel instances.
First, we'll install the rest_model_service package.
!pip install rest_model_service>=0.2.0

clear_output()
In order to deploy the IrisModelMock class, we'll create a configuration YAML file for the service:
service_title: Insurance Charges Model Service
models:
  - qualified_name: insurance_charges_model
    class_path: insurance_charges_model.prediction.model.InsuranceChargesModel
    create_endpoint: true
Notice that the we're pointing to the IrisModelMock class in the __main__ module which is the module inside of the jupyter notebook where this blog post is being written.
We can run the REST model service with these commands:
export REST_CONFIG=configuration/rest_config.yaml
uvicorn rest_model_service.main:app --reload
We can access the documentation at the root of the model service:
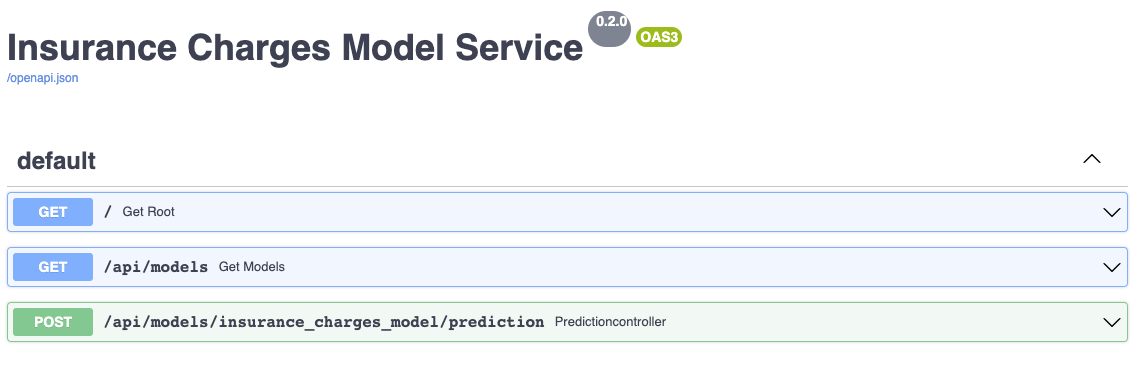
The model is running inside of the "api/models/iris_model/prediction" endpoint. We can make a prediction with a curl command:
!(curl -X 'POST' \
  'http://127.0.0.1:8000/api/models/insurance_charges_model/prediction' \
  -H 'accept: application/json' \
  -H 'Content-Type: application/json' \
  -d '{"age": 65, "sex": "male", "bmi": 50, "children": 5, "smoker": true, "region": "southwest"}')
{"charges":46277.67}
We were able to make a prediction with the undecorated model. Notice that we actually haven't loaded the decorator for the model yet. We'll stop the service with CTL C and try that next.
Adding a decorator to the IrisModelMock instance is done by adding the "decorators" key to the configuration:
service_title: Insurance Charges Model Service
models:
  - qualified_name: insurance_charges_model
    class_path: insurance_charges_model.prediction.model.InsuranceChargesModel
    create_endpoint: true
    decorators:
      - class_path: ml_model_decorators.prediction_id_decorator.PredictionIDDecorator
We'll point the service to the new config file and restart it:
export REST_CONFIG=configuration/decorators_config.yaml
uvicorn rest_model_service.main:app --reload
With the service now restarted using the PredictionIDDecorator, we can view the documentation for this endpoint:

As you can see, the modified description of the model is now displayed instead of the old description and the example value has the prediction_id field. Now we can try to make a prediction again:
!(curl -X 'POST' \
  'http://127.0.0.1:8000/api/models/insurance_charges_model/prediction' \
  -H 'accept: application/json' \
  -H 'Content-Type: application/json' \
  -d '{"age": 65, "sex": "male", "bmi": 50, "children": 5, "smoker": true, "region": "southwest"}')
{"charges":46277.67,"prediction_id":"5edbec33-ebec-4cdc-908b-e7d90d4bc2a2"}
We've made a prediction without providing a prediction_id, and we have the generated prediction_id in the response.
We can make another prediction request but with a provided prediction_id:
!(curl -X 'POST' \
  'http://127.0.0.1:8000/api/models/insurance_charges_model/prediction' \
  -H 'accept: application/json' \
  -H 'Content-Type: application/json' \
  -d '{"age": 65, "sex": "male", "bmi": 50, "children": 5, "smoker": true, "region": "southwest", "prediction_id": "asdf-1234-asdf-1234"}')
{"charges":46277.67,"prediction_id":"asdf-1234-asdf-1234"}
As we expected, the model is now returning prediction ids along with the predictions themselves.
Since the service is able to load decorators along with models, we can modify the runtime behavior of any model we wish, as long as we wrap the code in an MLModelDecorator class.
Closing
In this blog post, we showed how decorators work and how to create decorators that work with the MLModel base class. We also showed how we can quickly deploy decorators on models inside of a RESTful model service through configuration. Decorators are an easy way to add functionality to a model without having to modify the code of the model class itself. In this blog post, we deployed an UUID generator on an ML model instance without having to modify the code of the model’s class or the code of the REST model service that hosts the model. The combination of decorators and machine learning models can help us to quickly and easily deploy common functionality to many different models.